
- Help Center
- Student Management
- Editing Students and Sections
Add a Single Student To a Section
This article explains how to add a single student to a section..
Last updated - July 18, 2024- Begin by clicking on the Manage Students icon from the Educator Portal. This will take you to a list of your current students.
- Find the student whose information you would like to edit or change. You can scroll through your list of students or type a name into the search bar.
- Once you have found the correct student, click on the Edit button next to their name.
- The edit student window will open. Click on the Add Section drop-down menu and choose which of your sections the student should be added to. You can also remove the student from their current section if needed.
- Click on the Save student changes button to save all changes.
- If your class will be using Clever, Canvas, or Google SSO to log in to Skill Struck, make sure your student clicks on the corresponding button once they are ready to log in!
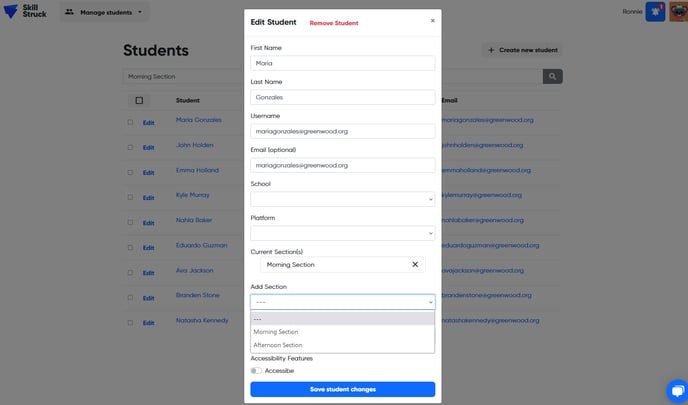
The Edit Student window is super helpful! From here, you can change a student's username, email address, password, platform, and edit which sections they are a part of. You can also use this window to remove a student.